User's Guide feedback on: Cisco Server Provisioner 6.6 User's Guide ("Chuck Berry") - Provisioning Example GeneratorAPI_Provisioning_Example_GeneratorAPI: Application Programming Interface > Provisioning Example Generator /Dear User's Guide Staff,
Provisioning Example Generator
Note: before using the API, it is important that you review individual provisioning tutorials (by OS, in "Create a MAC-Specific Provisioning Template and Role") so you understand Provisioner functionality and limitations when using the GUI.
Use the API Provisioning Example Generator to generate sample code to simplify the integration of Cisco Server Provisioner into your application.
The Example Generator produces 2 code samples showing how to call the Provisioner API from your application for each possible type of Provisioner function supported by the API (e.g., read, update, delete, etc.):
•Invoking the API through a browser
•Invoking the API through a wget call from a Linux system
•All field contents must be URL-encoded. It is recommended that all values pass through an encoding process.
The Example Generator also produces 2 code samples showing how the Provisioner API will reply to your application:
•XML with UTF-8-encoded values
•URL-encoded GET string
Before beginning to generate examples with the Generator, be sure you have obtained an APID.
Also, make sure that you have created at least one Provisioning Template prior to using the GUI beforehand.
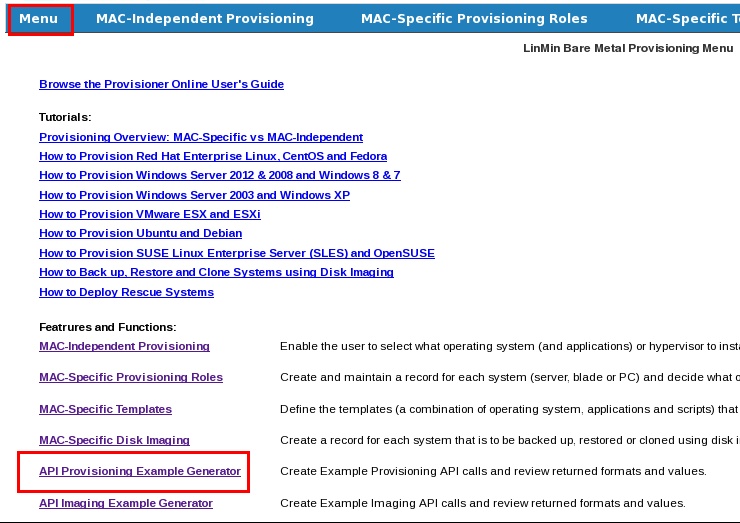
Accessing the Provisioning Example Generator
Starting with the Chuck Berry Plus package, the Provisioning Example Generator is accessed from the Application GUI Main Menu:
Note: for Provisioner 6.5.1 not upgraded with the Chuck Berry Plus package: the API Provisioning Example generator can be accessed with your browser:
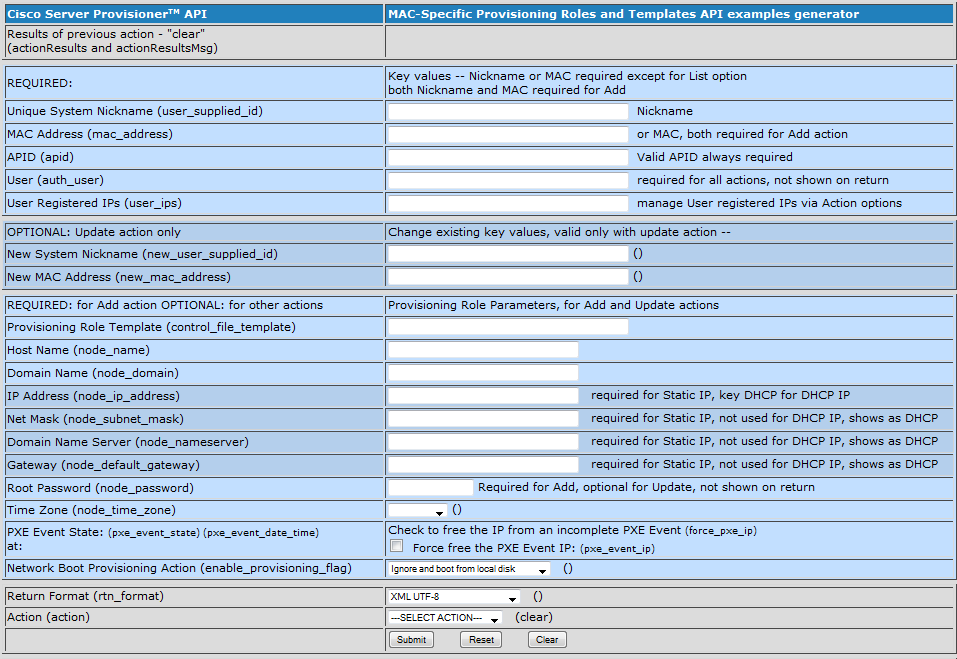
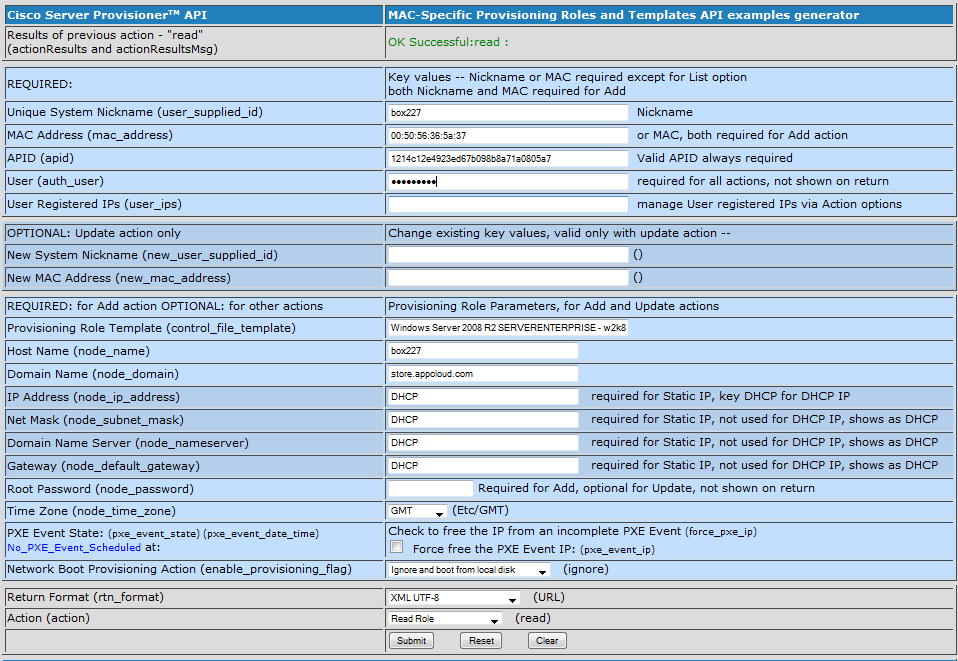
Then, complete the form and specify the Return Format of your choice and the desired action to be taken by the Provisioner PXE Server. In this case, we are adding a MAC-Specific Provisioning Role and will have a system provisioned with Windows Server 2008 R2:
Sample code generated for your application to call the Provisioner PXE Server API (replace "XXXXXXXX" values with valid values):
Note: name-value pair, also known as "name quoted value with UTF-8 encoded values" is being deprecated (even though they may appear in the example generator).
Now you have the syntax for how to call the Provisioner PXE Server API and for how the Provisioner PXE Server API will respond to your application.
Other Provisioning API actions
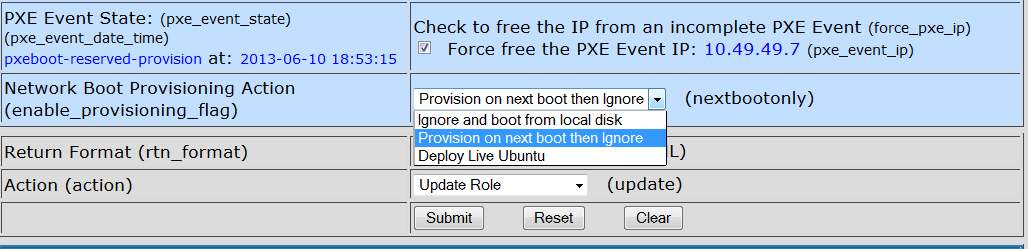
Next Boot Actions for each system:
•Ignore (boot from local disk, never re-provision)
•Provision on the next netboot, then ignore future provisioning requests
•Deploy Live Ubuntu into the RAM of the client system
API functions:
•Read (information on an existing system, given the MAC address or Nickname)
•Update (information on an existing system, given the MAC address or Nickname)
•Add (a system and create a Provisioning Role in the database)
•Delete (a system, given MAC or Nickname)
•List Roles: return list and information on all systems
•List Templates: returns the list of all existing Provisioning Templates
•New starting with Provisioner 6.3 PXE Event States: the API automatically returns the PXE Event State during "Read" (initially for Windows Server 2008/R2, ESX/ESXi, RHEL/CentOS). API supports the ability to force the freeing of a PXE Event IP after relocating a provisioned system from the Provisioning VLAN to a Production VLAN.
•Add APID User IPs authorized to make API calls
•Get APID User IPs authorized to make API calls
•Delete APID User IPS authorized to make API calls
Force Free PXE Event IP:
•Free or release PXE IP addresses to override DHCP address reservation for an aborted or failed PXE event with Update Role action
GUI Interaction:
It is very easy to see if your API call had the intended effect on systems by looking at the Provisioner PXE Server GUI (refresh pages after you have made API calls).
Please read all about MAC-Specific Provisioning in general as well as for each operating system you will be provisioning to provide you with the best information while integrating Cisco Server Provisioner into your application.