Imaging multi-disk Machines is no different from imaging Machines with a single disk: the LSM Snapshot Drive(s) default is "all", meaning all disks get captured and deployed automatically unless this value is changed.
But what if you want to capture or restore only selected disks, not all the disks in a Snapshot?
This tutorial illustrates how to capture the disk image Snapshots of all disks in a multi-disk Machine, then restore (or clone) only the disks selected by the User.
Note - Best practices when capturing a golden image that is intended to be cloned/deployed to other Machines:
•Always try to capture a golden image from a Machine with the smallest disk available (cloning to a disk the same size or larger is automatic)
•Always try to capture a golden image from a Machine with the simplest disk configuration (e.g., a single disk when possible) so that you don't encounter trying to deploy "all" disks to a Machine with fewer disks than the Machine the golden image was captured from
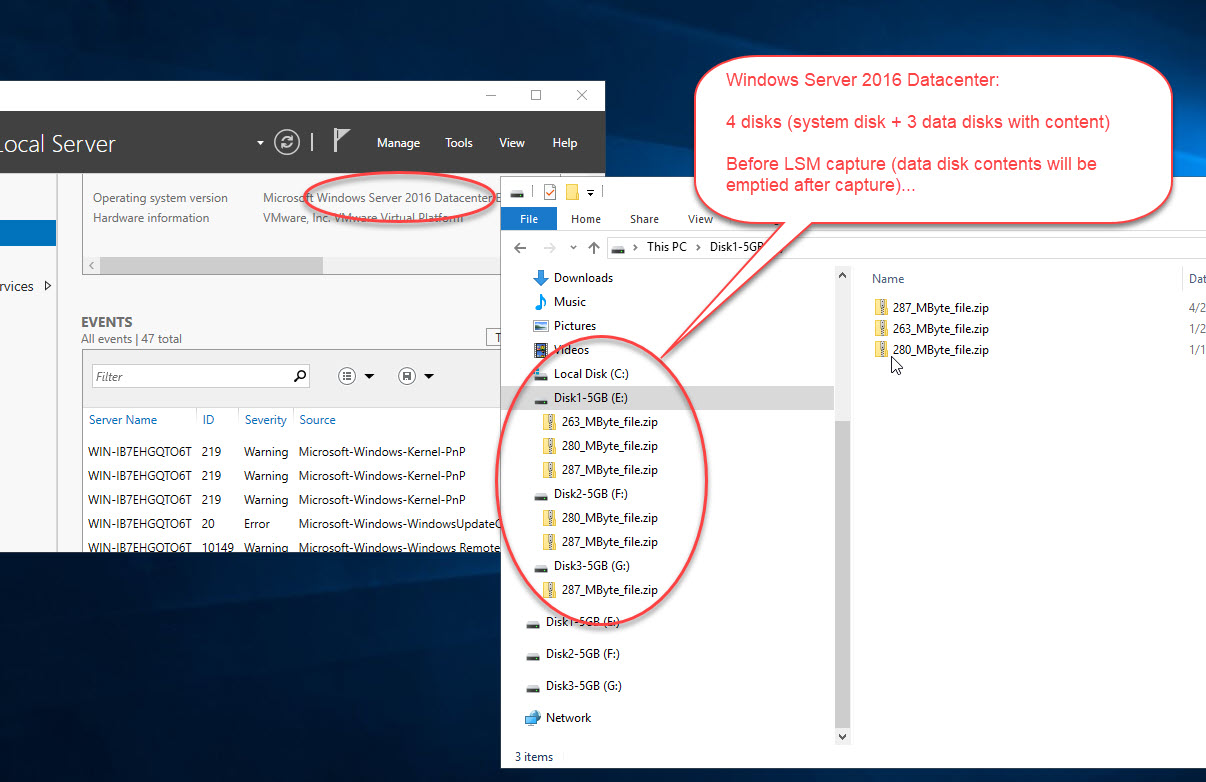
•Machine: Windows Server 2016 Datacenter with 4 disks:
oC:\ System Disk
oE:\ Data Disk
oF:\ Data Disk
oG:\ Data Disk
•Tutorial Sequence
a.Machine will have all 4 Disks captured in a Snapshot, using the default "all" disks Snapshot Drive(s).
b.User will delete all 3 Data Disk contents (to make it easy to verify that only the selected disks were restored)
c.User will select only 2 Data Disks to be Restored and restore them
d.User will verify that only the 2 Data Disks were restored
•Tutorial will show highlights only and assumes the User has already serviced Machines, captured and deployed Snapshots, created Payloads etc.
Reminder: only Machines with BIOS firmware (not UEFI) are supported at this time. UEFI support is coming soon!
The WS2016 Machine's basic disk layout of a system disk and 3 data disks:
We will see later in this tutorial that because the LSM RAM Agent is Ubuntu Linux-based, the disks captured or deployed will be listed in Linux format:
In this WS2016 example with 4 disks:
•sda = 1st disk = disk0 = C:\
•sdb = 2nd disk = disk1 = E:\
•sdc = 3rd disk = disk2 = F:\
•sdd = 4th disk = disk3 = G:\
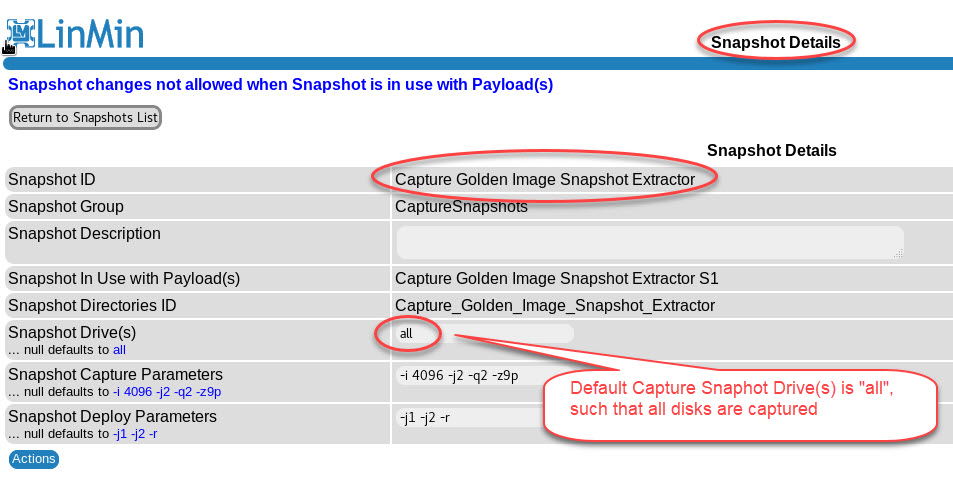
The default Capture Snapshot Drive(s) is "all", so all disks will be captured individually, in sequence:
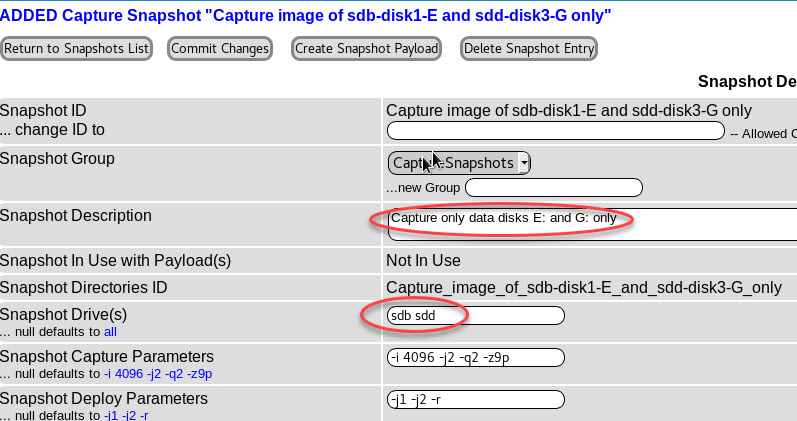
Note: if you wish to capture only specific disks of a Machine, instead of Snapshot Drive(s) = "all", specify only disks you wish to capture, e.g., sdb, sdd.
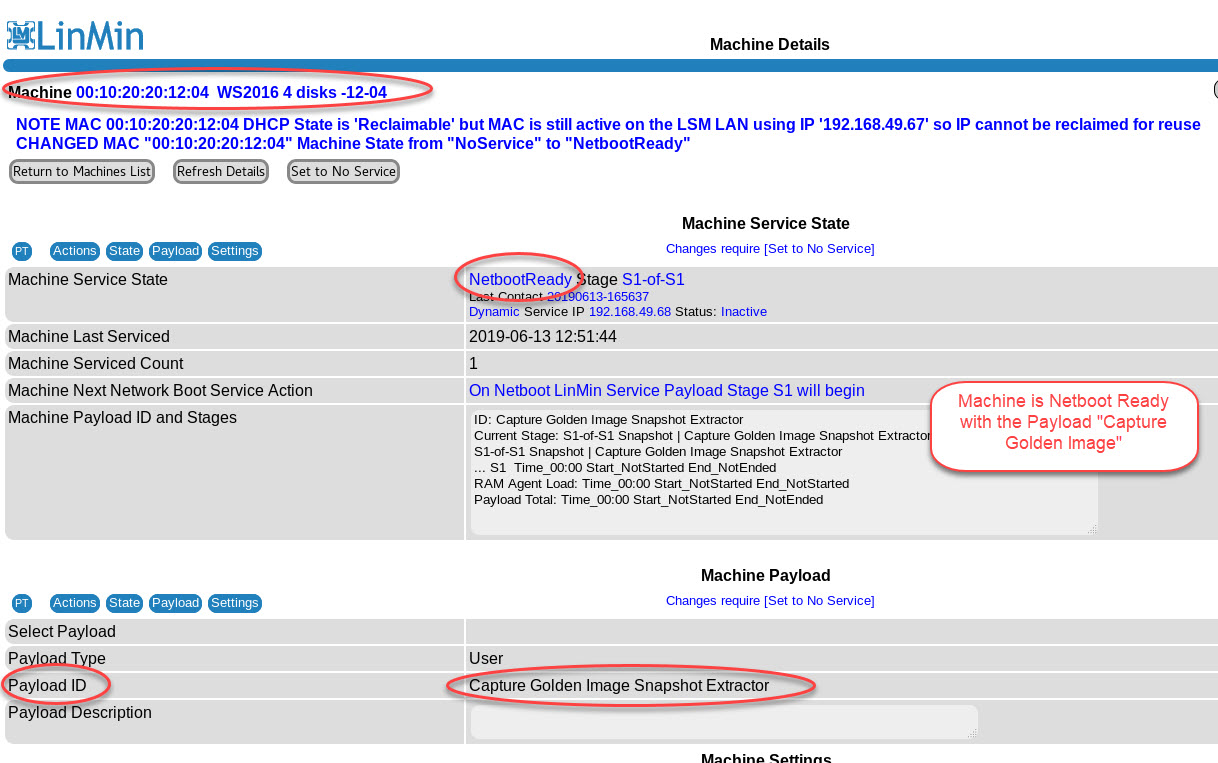
Set the Machine to Netboot Ready with the Capture Golden Image Payload:
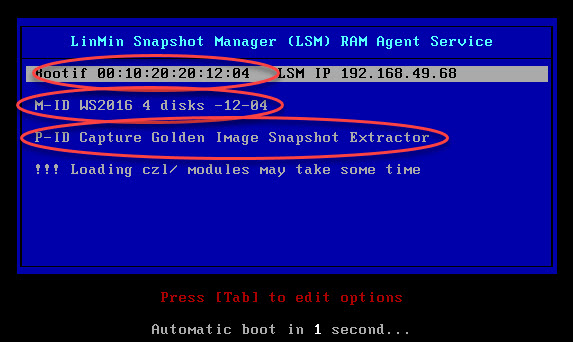
PXE-boot the Machine:
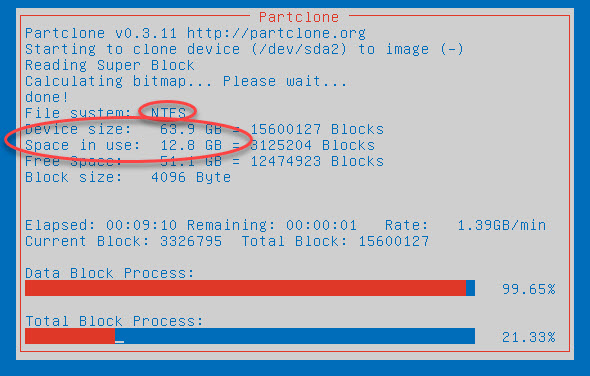
Observe each drive having its bit-map calculated and being captured. The image below is for C:\, the System Disk:
After the Payload has been processed and all 4 disks capture, the Machine reboots (default behavior unless changed by the User):
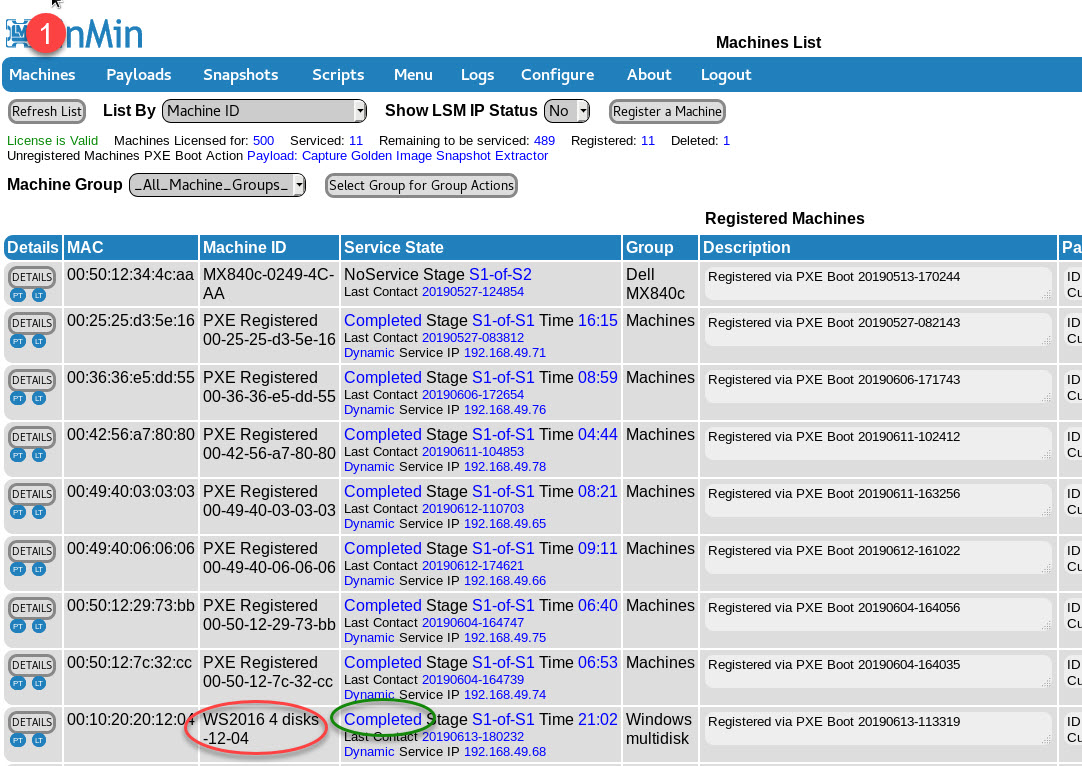
Back on the LSM Server GUI, after going to or refreshing the Machines List, you'll see the Machine State is Completed:
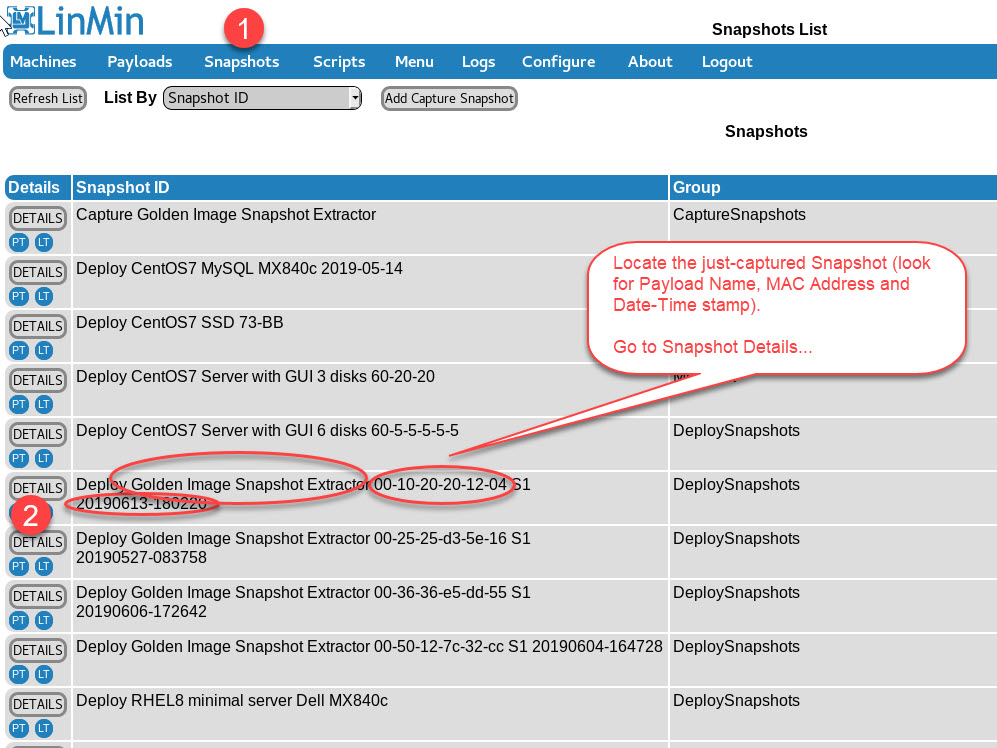
Go to the Snapshots List, identify the just-captured Snapshot, and go to its Snapshot Details:
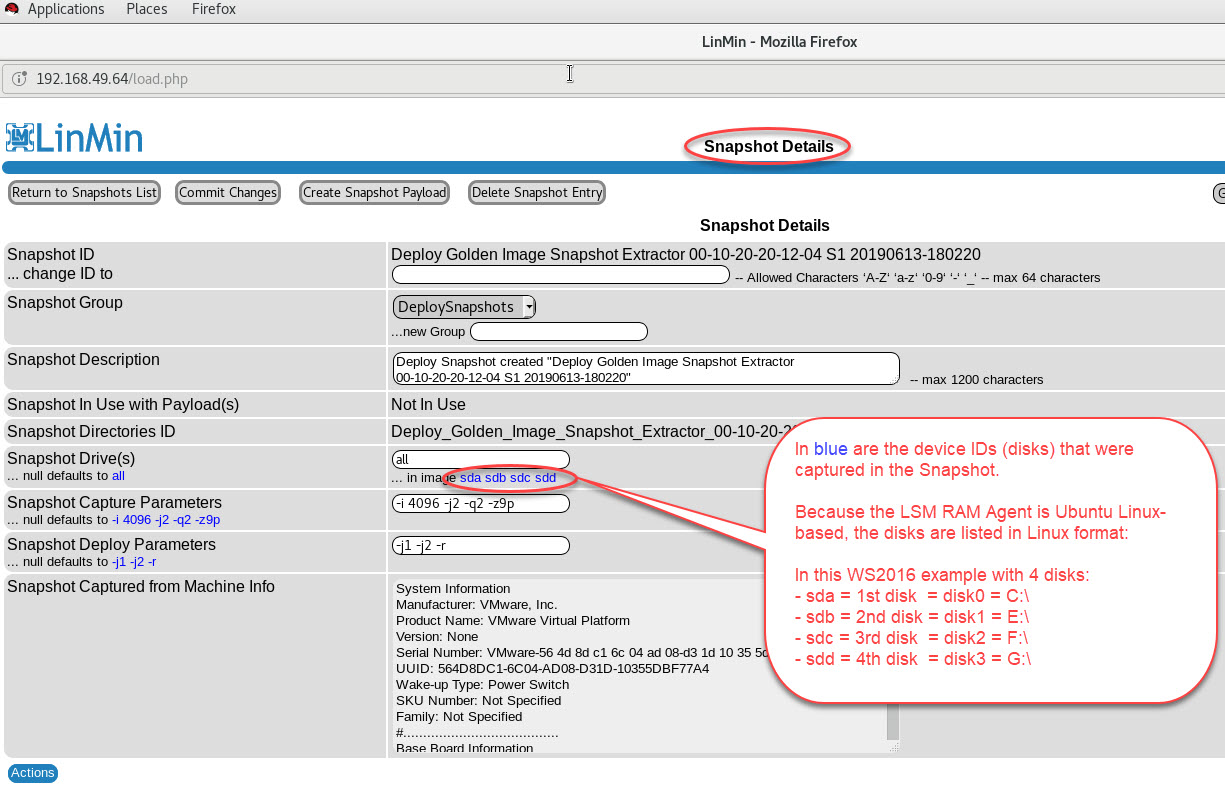
In Snapshot Details, you will see in blue are the device IDs (disks) that were captured in the Snapshot.
Because the LSM RAM Agent is Ubuntu Linux-based, the disks are listed in Linux format:
In this WS2016 example with 4 disks:
•sda = 1st disk = disk0 = C:\
•sdb = 2nd disk = disk1 = E:\
•sdc = 3rd disk = disk2 = F:\
•sdd = 4th disk = disk3 = G:\
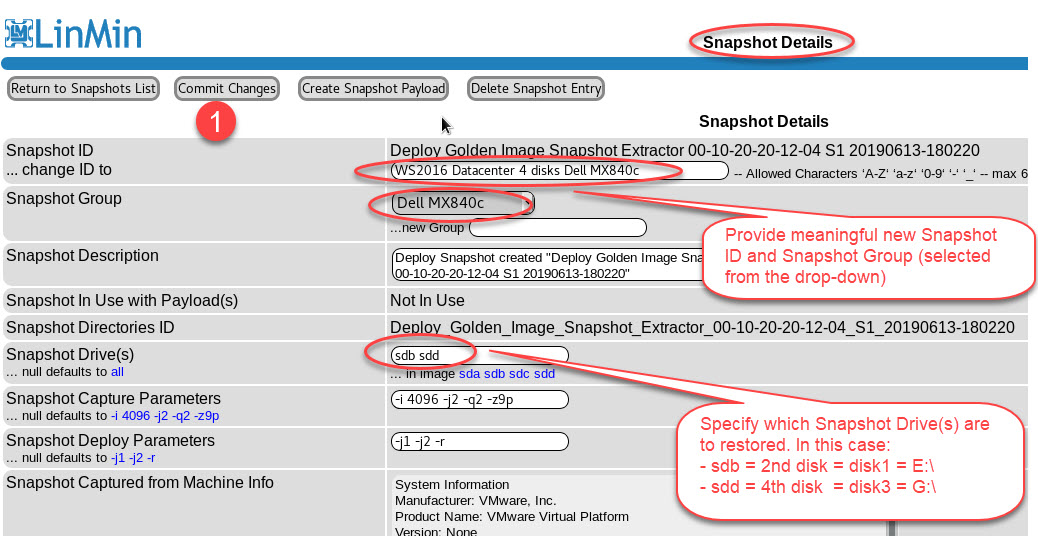
We will next rename the Snapshot ID to something meaningful, change the Snapshot Group and specify which disks we wish to deploy:
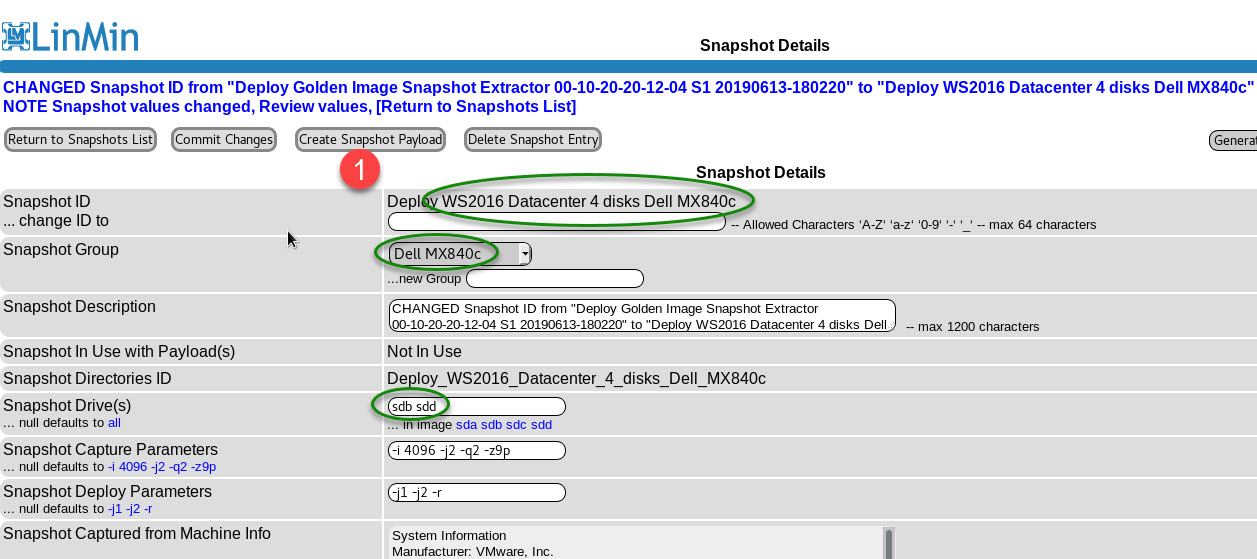
Review the changed values then select Create Snapshot Payload:
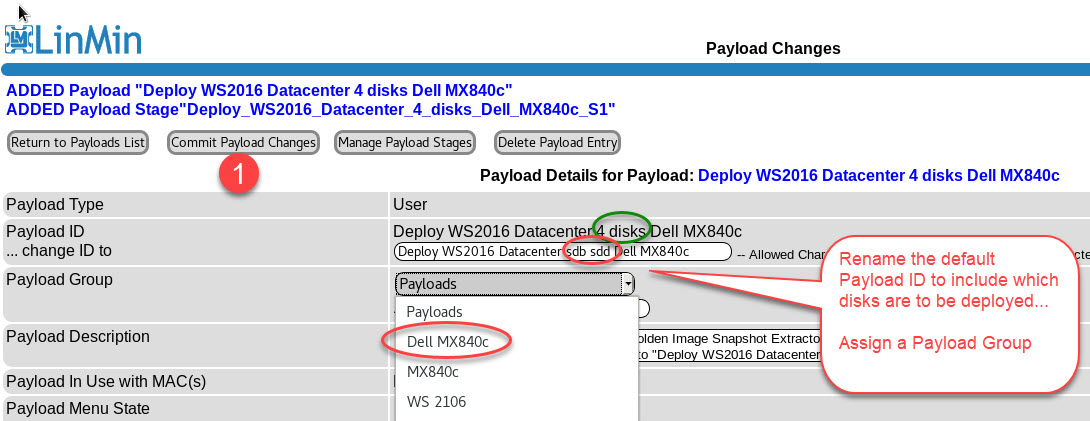
The Payload was created with the name of the source Snapshot. Rename the Payload to be more descriptive and assign a Payload Group:
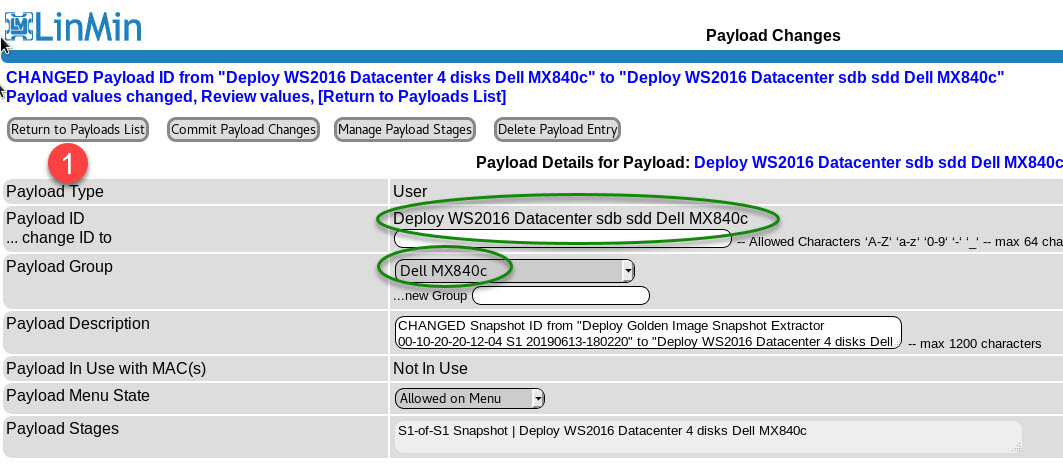
Review the changes to the Payload, then Return to Payloads List:
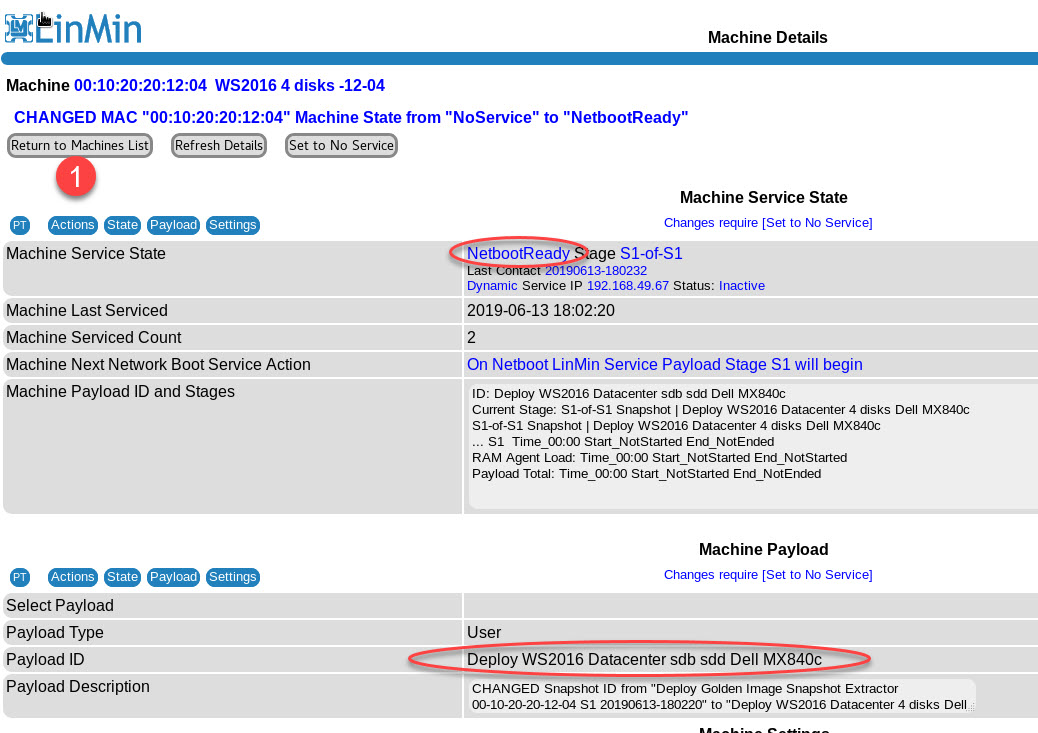
Assign the Payload to the Machine and set it to Netboot Ready:
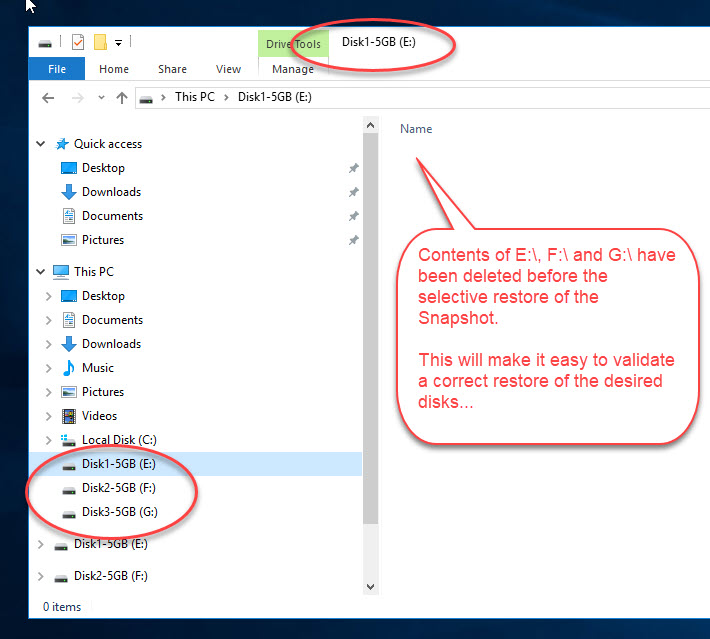
Before we start deploy the Payload, let's delete the contents of E:\, F:\ and G:\. This makes it easier to validate a correct restore (of E:\ and G:\ only):
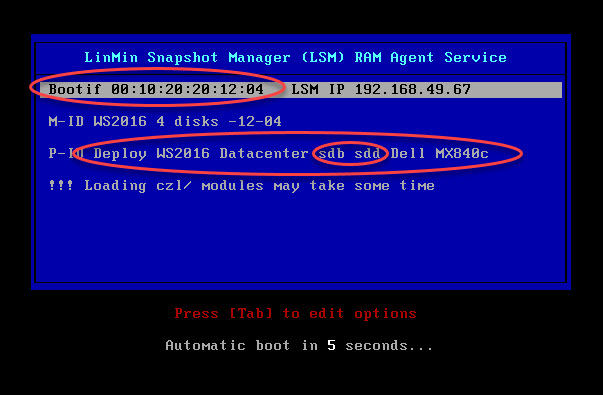
Now, let's PXE-boot the Machine:
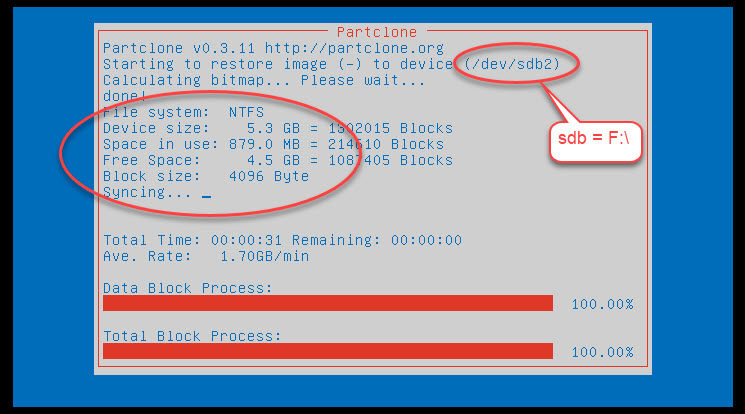
You will see a succession of LSM RAM Agent Partclone screens performing both bitmap checks (for all disks) and copying of disk contents (for sdb and sdd only):
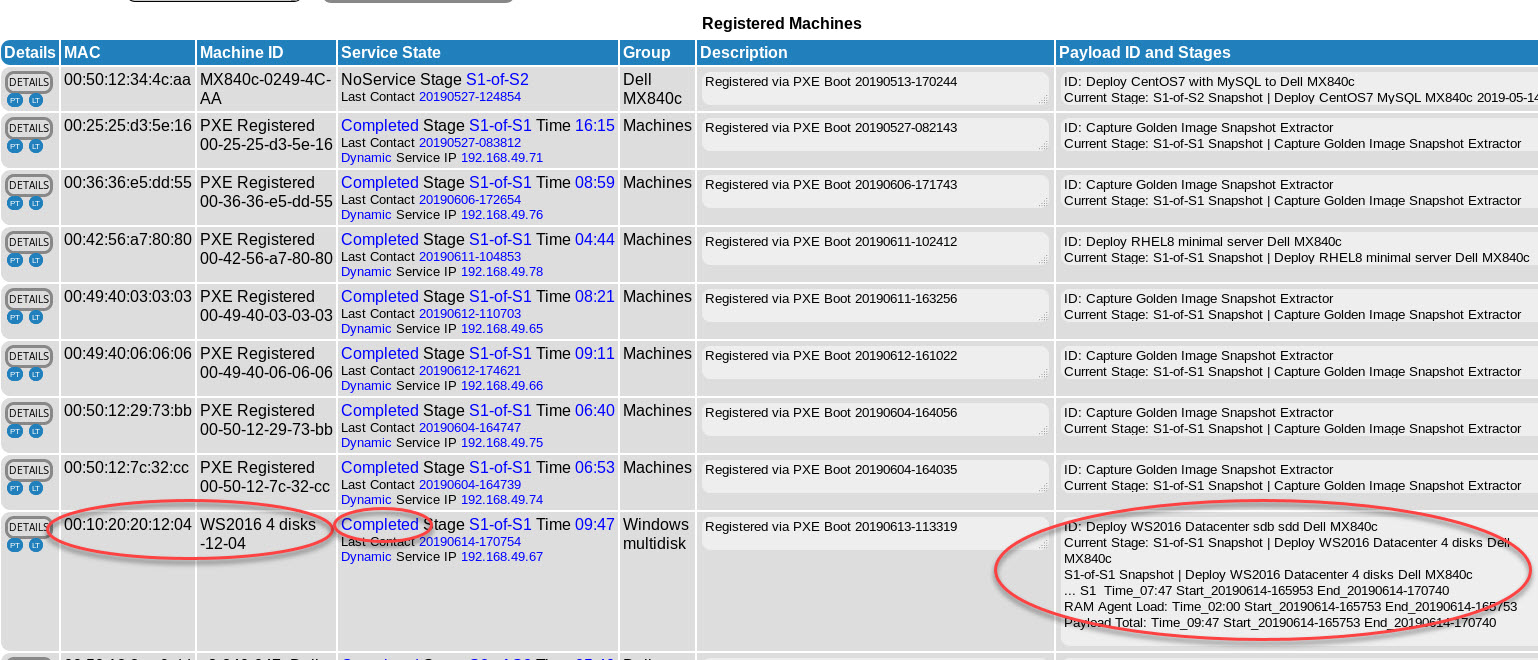
After refreshing the Machines List, you note that the Payload deployment has completed and the Machine State is set to Completed:
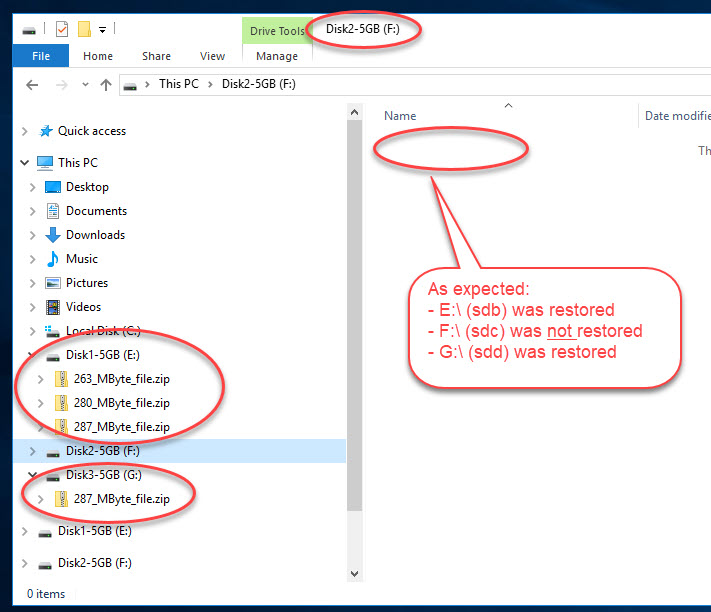
Upon opening Windows Explorer, we see that the disks E:\ and G:\ were restored, and F:\ was not restored, as expected:
In this tutorial, we used Payloads with a single Stage (Capture a Snapshot or Deploy a Snapshot). You could of course have created multi-Stage Payloads as well to perform more complex tasks than basic image capture and deployment.
