Perform RHEL/CentOS installation from ISO with "Minimal Install" software option only
Only the "Minimal Install" ISO installation option is supported.
You do not need the latest RHEL 7 or CentOS 7 ISO, since performing a yum update will bring the distribution current.
At OS installation time, you will be prompted for:
•LSM Server IP address : ___.___.___.___ (must be on the same subnet as the LSM DHCP IP Service Range)
Using your resources from Requirements, launch your RHEL 7.x or CentOS 7.x installation ISO on your LSM Server Machine:

Select English (required):

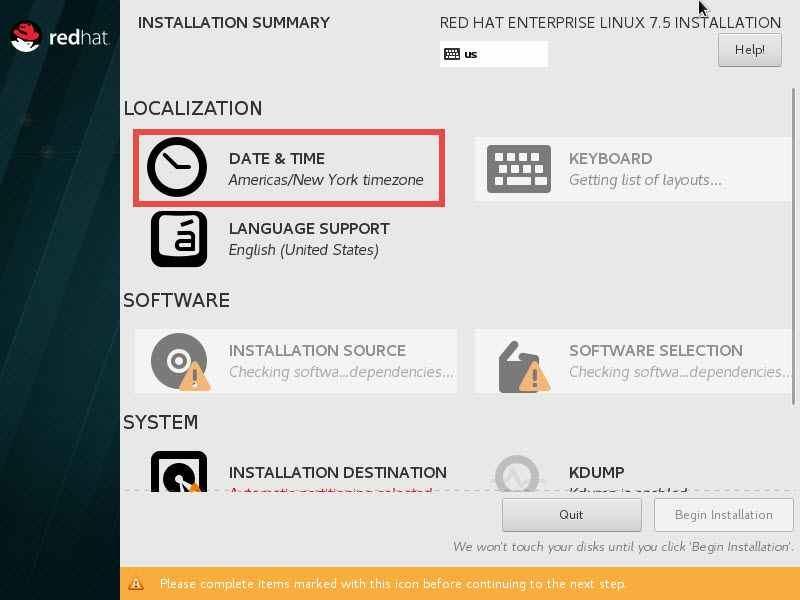
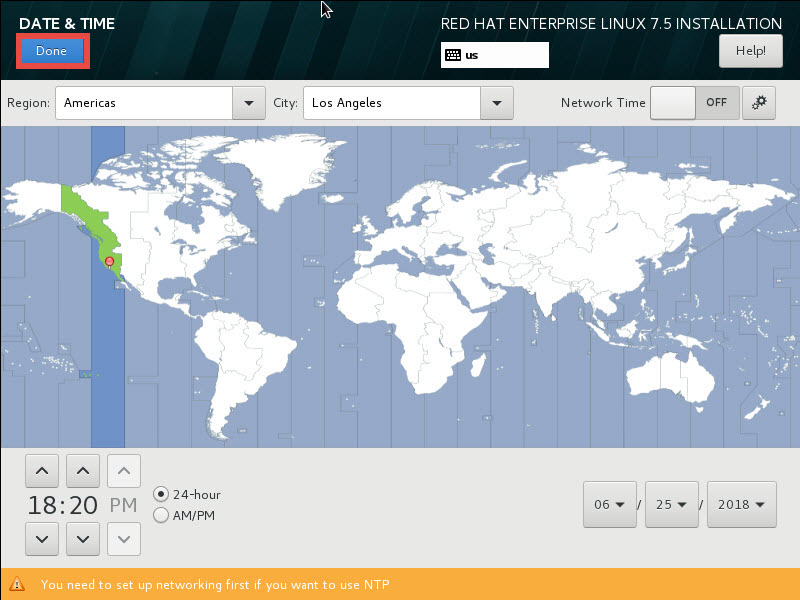
Select your time zone:
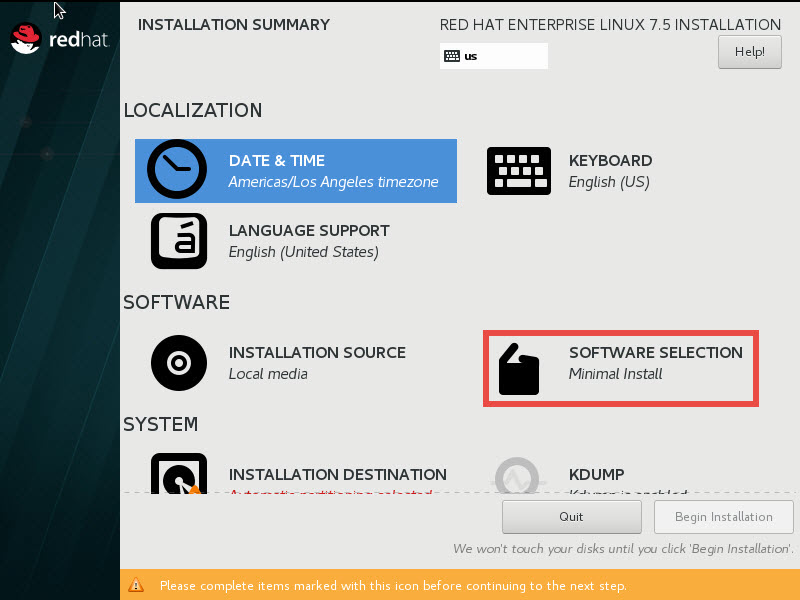
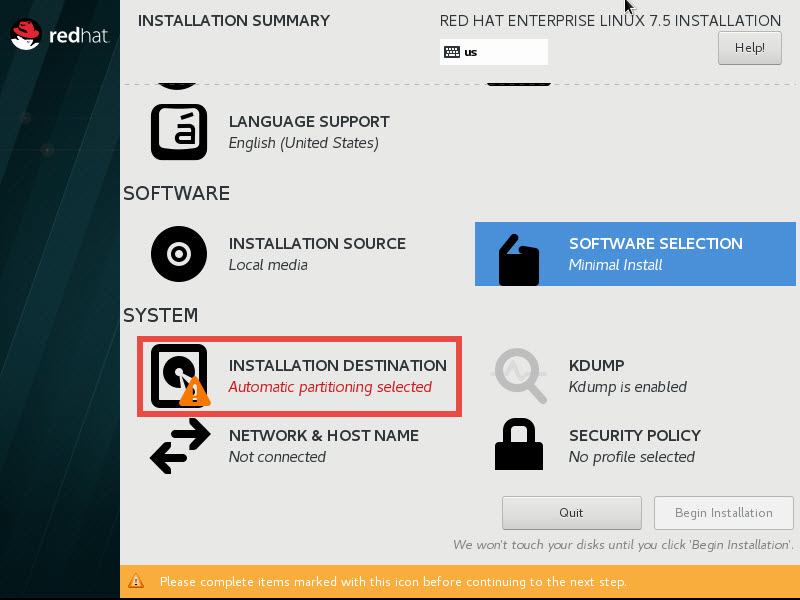
Proceed to Software Selection:
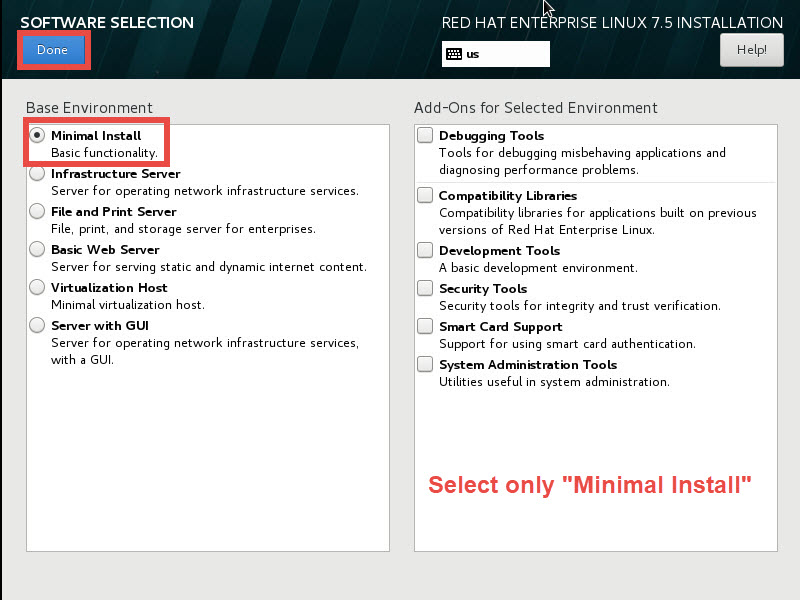
Select "Minimal Install" and no other selections:
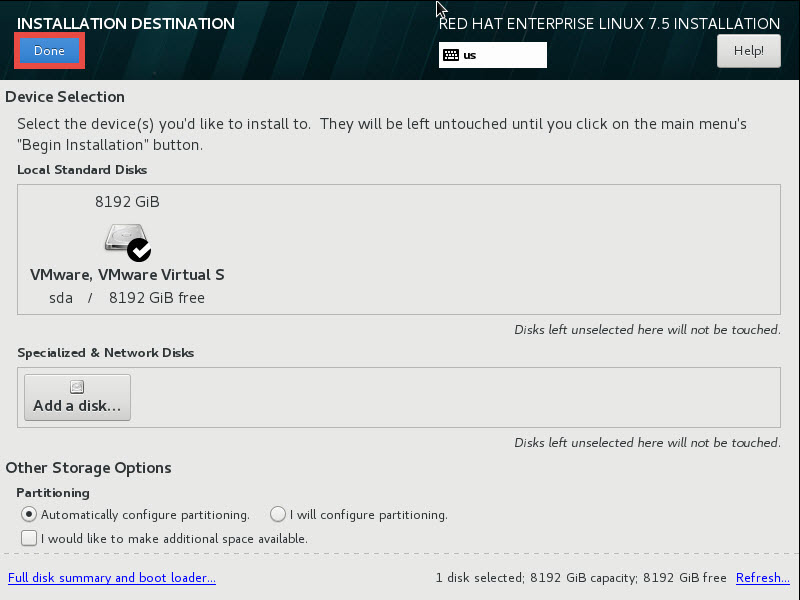
Proceed to Installation Destination (Storage):
Select your installation drive (as big a drive as possible; 1TB+ for POC/trial):
Proceed to Network configuration:
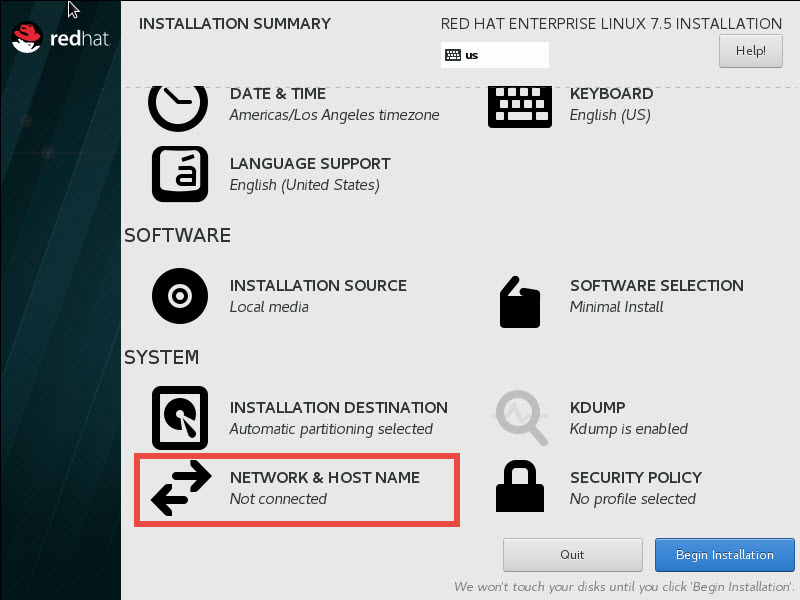
Select your Network device:
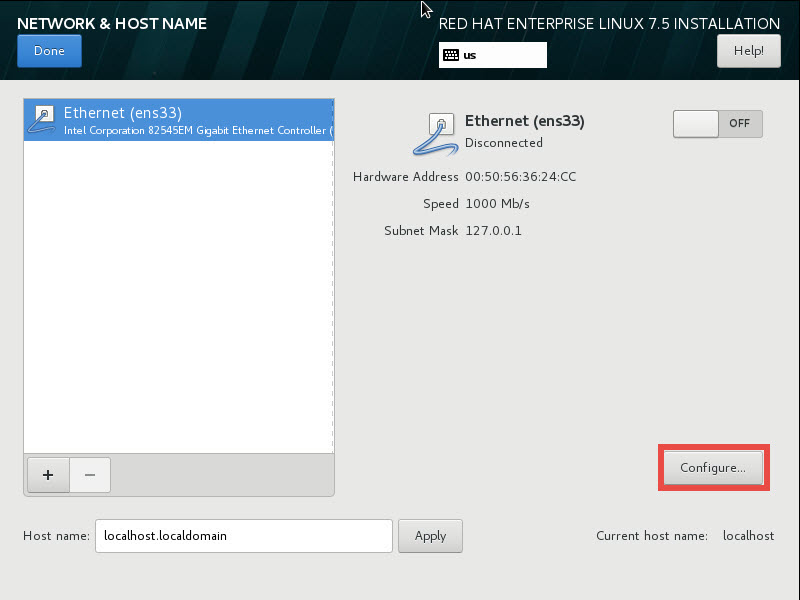
Proceed to Network configuration.
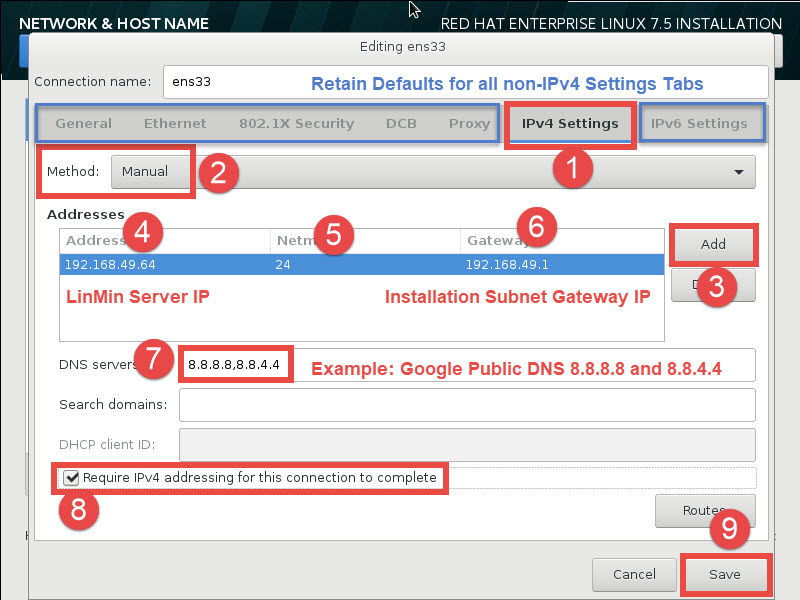
Relax! Just click the buttons in sequence and enter your collected values:
•LSM Server IP address : ___.___.___.___. Example: 192.168.49.64 (must be inside the LSM DHCP IP Service Range)
•Gateway IP address: ___.___.___.___. Example: 192.168.49.1
•Netmask: ___.___.___.___ or /__. (/24, /25, /26 or, /27) Example: 255.255.255.0 or /24 for a 1-254 IP (.0-.255) subnet.
•DNS IP address: ___.___.___.___, ___.___.___.___. Example: 8.8.8.8, 4.4.4.4 (Google public DNS IPs)
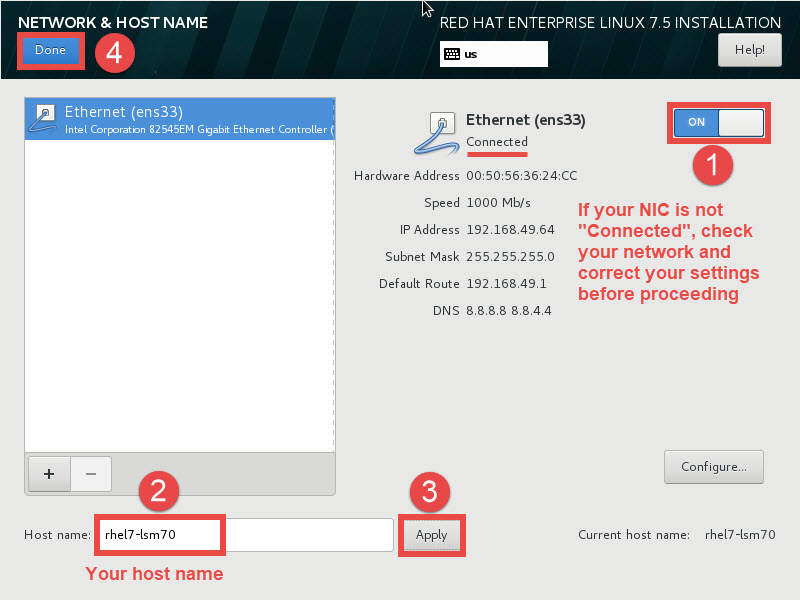
Power on your Interface and enter your host name. Make sure you see that your interface is Connected before proceeding:
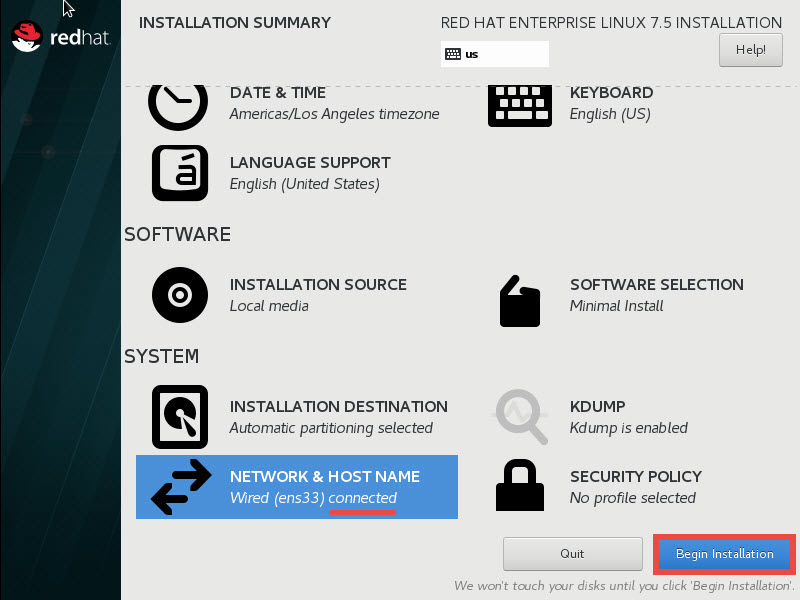
Return to the Installation Summary and select "Begin Installation":
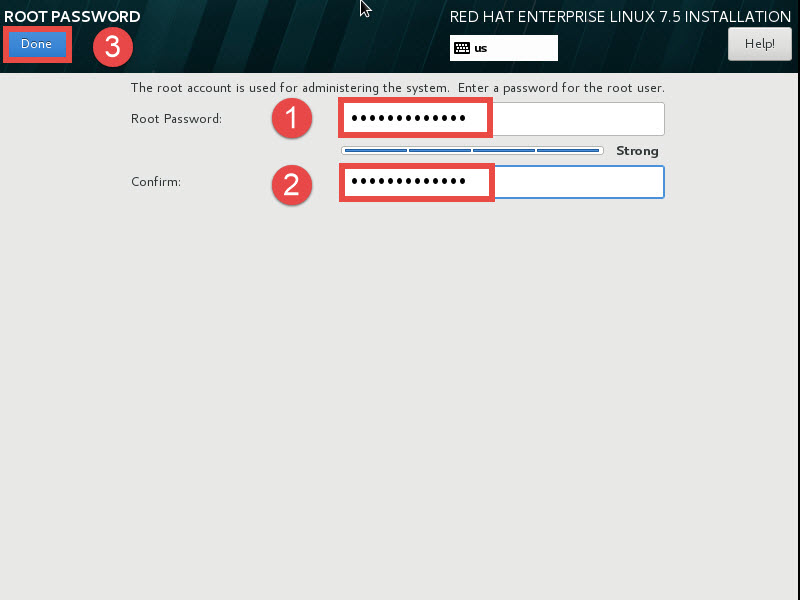
Proceed to select the root password:
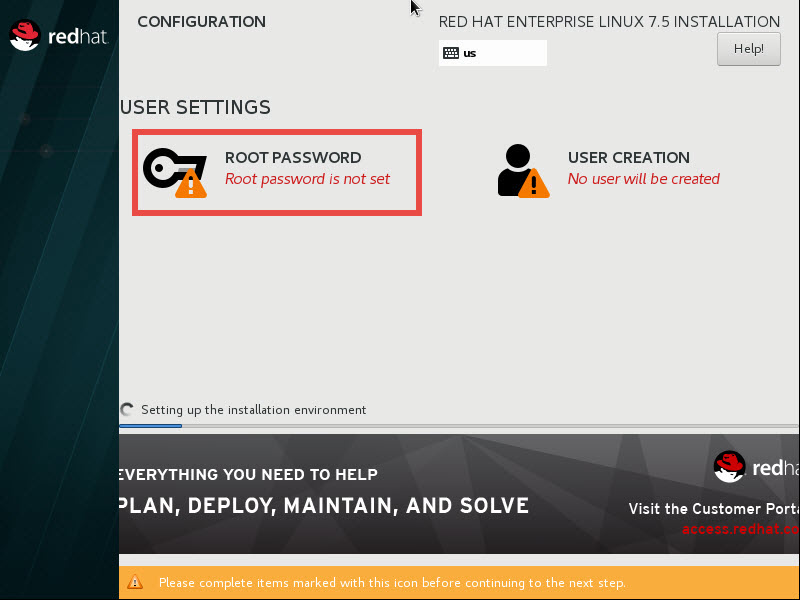
Enter and confirm your root password:
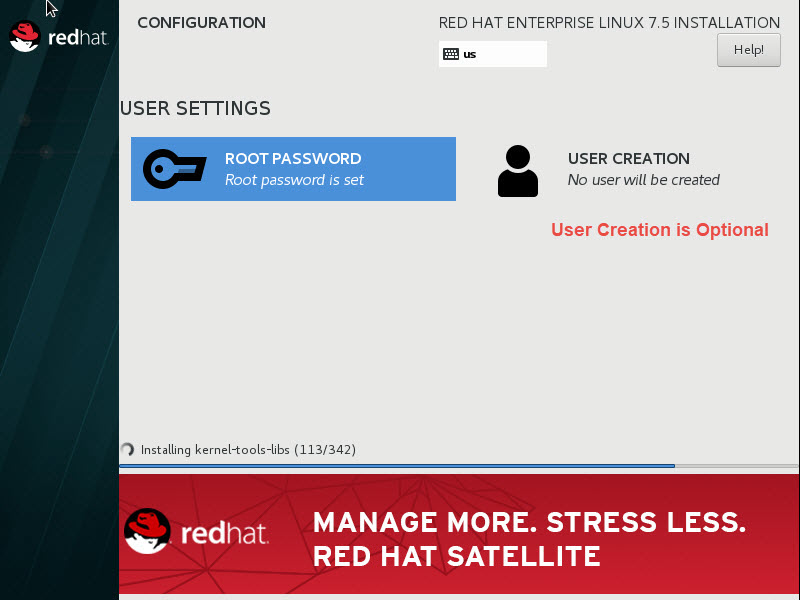
User creation is optional. Note that all LSM command line functions require root access and that the LSM Server is dedicated and is not to be used for any purpose other than running the LinMin Snapshot Manager, so no non-root Users should be on this Machine:
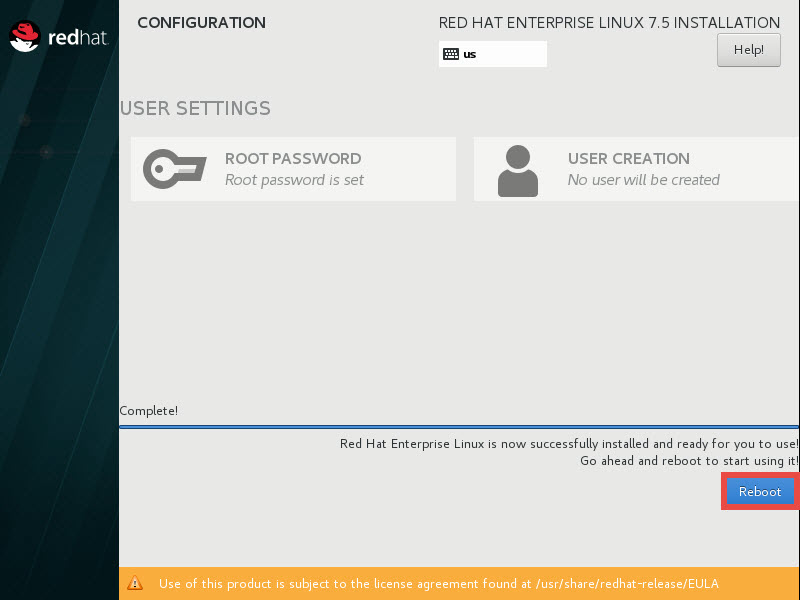
You are done selection installation options. Select "Reboot":
Congratulations! Next, update your OS and your Machine will be ready to install LinMin Snapshot Manager.
Update your RHEL/CentOS installation to bring current
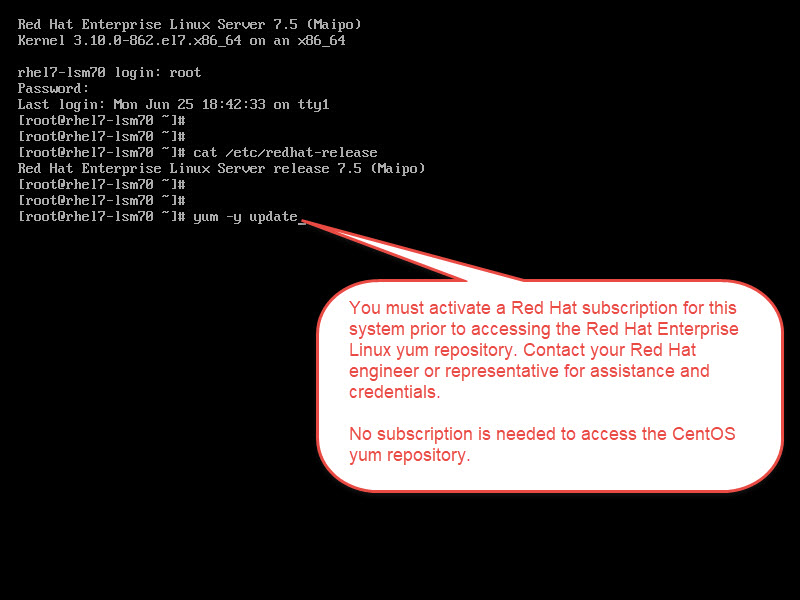
RHEL-only: register your system with Red Hat to enable yum repository access.
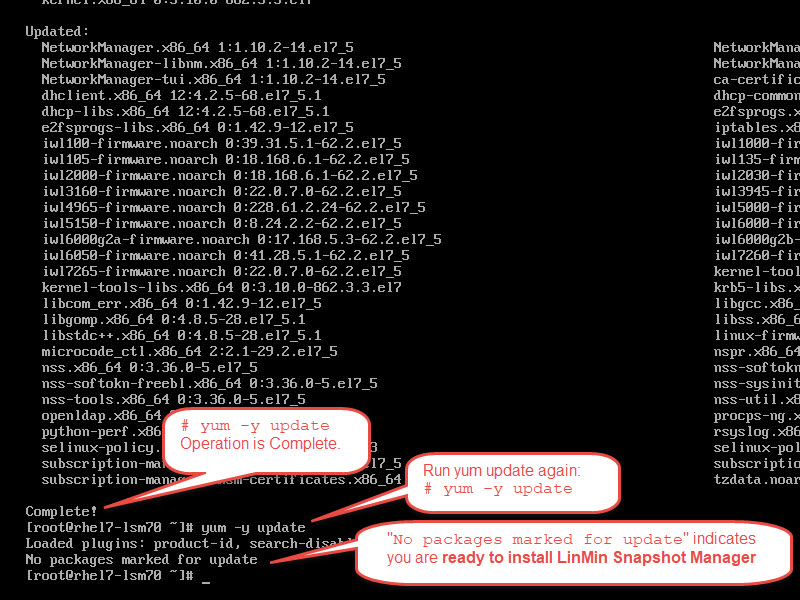
RHEL and CentOS: perform a yum -y update to bring your system current.
Your system is now ready to install LinMin Snapshot Manager:
If your LSM Server is a Virtual Machine, suspend and take a VM Snapshot.
Proceed to install LinMin Snapshot Manager.
Search keyword(s): yum_access