User's Guide feedback on: Cisco Server Provisioner 6.6 User's Guide ("Chuck Berry") - Using Live Ubuntu to Erase Disk ContentsDeploying_Rescue_Systems_Live_Ubuntu_Erase_DiskTutorial: Deploy Rescue Systems (incl. Live Ubuntu) > Deploy Live Ubuntu > Using Live Ubuntu to Erase Disk Contents /Dear User's Guide Staff,
Using Live Ubuntu to Erase Disk Contents
In some cases, you may need to erase the contents of a disk (or "clear" a disk) before being able to provision a system.
The examples below for for sda. Replace sda with sd{b,c,d} for other drives
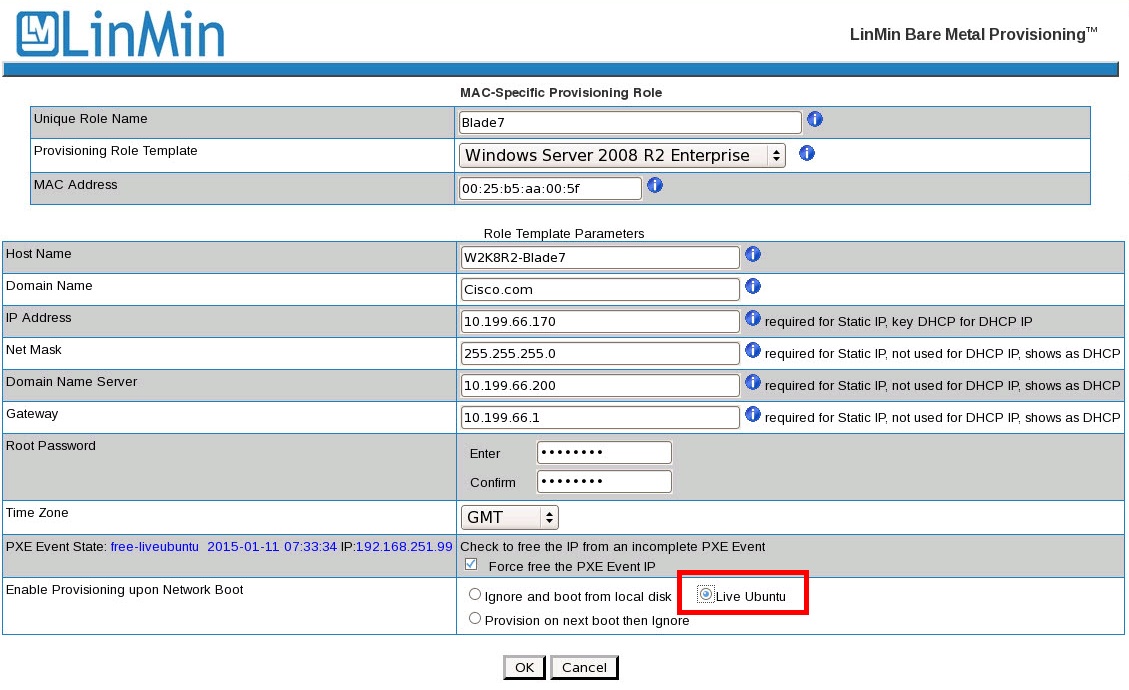
To erase the disk's content, set the BIOS to Network Boot first, then deploy Live Ubuntu.
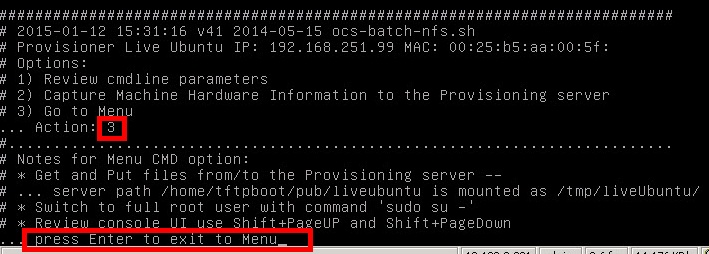
Key "3" to Go to Menu, and hit "Enter"
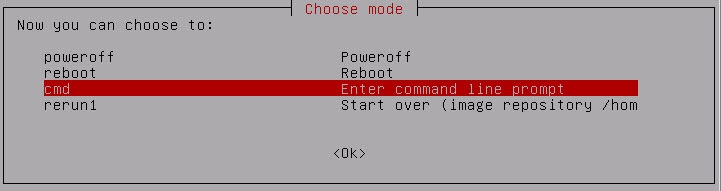
Select "cmd" to open a command line terminal:
Switch to root user:
# sudo su -
Optional - start a script file that can be read on the Provisioner PXE Server:
Normally, clearing the MBR is all that is needed unless the drive is corrupt up or has an unrecognized file system on it. Then a wipe of the entire disk is required.
Clear the entire drive (this may take considerable time)
# dd if=/dev/zero of=/dev/sda bs=1M
Check the disk:
# sfdisk -l
Reset the drive partitions
# sfdisk -f /dev/sda
* note the number of cylinders
For use with Windows, ",07" is used for the Windows NTFS file system format format
If the script option was used, end the script action with <Cntl-D>
Power off the client and follow the instructions:
# poweroff
Finally, reset your BIOS if required:
•For Windows and Linux, keep the boot sequence "Network boot then hard drive"
•For ESX and ESXi, set the boot sequence to "Hard drive first, then network boot"
Note for UCS Manager: disassociating then re-associating the Blade's or Server's Service Profile provides a clean disk from which to start, so no Live-Ubuntu operations are typically needed.
Examples
Linux system before:
# sfdisk -l
Disk /dev/sda: 5221 cylinders, 255 heads, 63 sectors/track Units = cylinders of 8225280 bytes, blocks of 1024 bytes, counting from 0
Device Boot Start End #cyls #blocks Id System
/dev/sda1 * 0+ 12 13- 104391 83 Linux
/dev/sda2 13 143 131 1052257+ 82 Linux swap / Solaris
/dev/sda3 144 5220 5077 40781002+ 83 Linux
/dev/sda4 0 - 0 0 0 Empty
Linux system after - all on sda1 with the "Linux" designation is what is needed
# sfdisk -l Disk /dev/sda: 5221 cylinders, 255 heads, 63 sectors/track Units = cylinders of 8225280 bytes, blocks of 1024 bytes, counting from 0
Device Boot Start End #cyls #blocks Id System
/dev/sda1 * 0+ {last} {all} {all} 83 Linux
/dev/sda2 0 - 0 0 0 Empty
/dev/sda3 0 - 0 0 0 Empty
/dev/sda4 0 - 0 0 0 Empty
Windows system after - all on sda1 with the "NTFS" designation is what is needed
# sfdisk -l Disk /dev/sda: 5221 cylinders, 255 heads, 63 sectors/track Units = cylinders of 8225280 bytes, blocks of 1024 bytes, counting from 0